
The EG4 18kPV is a high-efficiency hybrid inverter designed for solar and battery systems, offering advanced features like PV charge priority and peak shaving modes.
1.1 Overview of the EG4 18kPV System
The EG4 18kPV is a high-performance hybrid inverter designed for seamless integration with solar and battery systems. It is ETL and cETL listed, ensuring compliance with national safety standards. This inverter supports advanced features such as PV charge priority and peak shaving, making it ideal for residential and light commercial applications. The system is part of an all-in-one solution, offering a user-friendly interface for monitoring and controlling energy flow. Its compact design allows for wall-mounting, saving space while maintaining efficiency. The EG4 18kPV is compatible with a range of solar panels and battery configurations, providing flexibility for various energy storage needs. With built-in communication capabilities, it enables easy setup and monitoring through Wi-Fi or other network connections, ensuring optimal performance and reliability.
1.2 Key Features and Benefits
The EG4 18kPV inverter boasts an array of features that enhance performance and user experience. It supports hybrid functionality, allowing seamless integration of solar and battery systems for efficient energy management. With PV charge priority, the inverter maximizes solar energy utilization, reducing reliance on grid power. Peak shaving mode helps manage high energy demand periods, optimizing energy consumption. The inverter is ETL and cETL certified, ensuring safety and reliability. Its compact, wall-mountable design saves space while maintaining durability. Advanced communication capabilities enable remote monitoring and control via Wi-Fi, offering real-time system insights. Compatibility with various battery types and solar panels provides flexibility for different configurations. These features make the EG4 18kPV an ideal choice for modern energy systems, balancing efficiency, safety, and convenience.
The EG4 18kPV inverter operates at 18kVA with a maximum PV input of 16kW, supporting 240V AC output and compatible with various battery configurations for reliable performance. The EG4 18kPV inverter is designed with a rated power of 18kVA, ensuring reliable performance for residential and small-scale commercial applications. It operates at a maximum PV input of 16kW, optimizing energy conversion efficiency. The inverter supports a 240V AC output voltage, making it compatible with standard electrical systems. Its high efficiency, typically around 95%, minimizes energy losses during inversion. The system also features a maximum power point tracking (MPPT) efficiency of up to 99%, enhancing solar energy utilization. These specifications ensure the EG4 18kPV is suitable for a wide range of solar and battery configurations, providing consistent and efficient power supply. Rated voltage and power parameters are critical for system compatibility and performance optimization. The EG4 18kPV inverter is designed to seamlessly integrate with a variety of solar panels and battery systems, ensuring optimal energy management. It supports solar panel configurations up to 16kW, with MPPT efficiency of 99%, maximizing solar energy utilization. The inverter is compatible with leading battery brands, enabling efficient energy storage and discharge. Its hybrid design allows it to function in both off-grid and grid-tie modes, providing flexibility for different applications. The system also supports PV charge priority, ensuring solar power is utilized first before drawing from the grid. This feature enhances energy independence and reduces reliance on external power sources. Additionally, the EG4 18kPV is compatible with 240V AC systems, making it suitable for standard electrical setups. Its advanced communication capabilities ensure smooth integration with battery management systems for real-time monitoring and control; Always wear protective gear, including gloves and safety glasses, when handling the EG4 18kPV inverter. Ensure the system is grounded properly to prevent electric shocks. Adhere to all safety protocols when handling the EG4 18kPV inverter to ensure a secure installation and operation process. Always disconnect the power supply before performing any maintenance or repairs. Wear appropriate protective gear, including insulated gloves and safety glasses, to minimize risks of electric shock or injury. Avoid installing or operating the system in humid or dusty environments, as this may compromise performance and safety. Regularly inspect the inverter and connected components for signs of damage or wear. Ensure proper ventilation to prevent overheating, which can lead to system failure or fire hazards. Never touch electrical components with wet hands or while standing on a conductive surface. Follow the manufacturer’s guidelines strictly and keep emergency contact information readily available. Handle the EG4 18kPV inverter with care to prevent damage. Store it in a dry, cool environment, away from direct sunlight and moisture. Avoid stacking heavy objects on the inverter or its components. Use the original packaging for storage to protect against physical damage. The ideal storage temperature is between 0°C and 40°C, and humidity should be below 60%. Ensure the unit is securely fastened during transport to prevent movement-induced damage. Keep the inverter away from flammable materials and avoid exposure to corrosive substances. Prior to installation, inspect the unit for any signs of damage sustained during shipping or storage. Follow the manufacturer’s guidelines for proper handling to maintain the warranty and ensure optimal performance. Always refer to the user manual for specific storage recommendations. The EG4 18kPV inverter requires a suitable location with proper ventilation and protection from environmental elements. Ensure compliance with local electrical codes and regulations during installation. To ensure optimal performance, the EG4 18kPV inverter should be installed in a well-ventilated, cool, and dry location. Avoid direct sunlight, moisture, or extreme temperatures. Ensure the inverter is easily accessible for maintenance and monitoring. The location should be close to the battery bank and solar panels to minimize power losses. Additionally, it should be installed on a sturdy wall that can support the unit’s weight. Keep the area clear of flammable materials and ensure proper clearance for airflow. Compliance with local electrical codes and regulations is essential for safe and efficient operation. Proper placement will maximize efficiency and system reliability. Always refer to the user manual for specific guidelines. To enable remote monitoring and control, connect the EG4 18kPV inverter to a local network using a Wi-Fi dongle or Ethernet cable. Ensure a stable internet connection for real-time data access. Install the EG4 monitoring app to track performance metrics and receive alerts. Configure the inverter’s communication settings according to the user manual, ensuring proper IP address and port configurations. Verify that all network parameters are correctly set for seamless communication between the inverter and external devices. Regularly update firmware to maintain optimal performance and security. Always follow safety guidelines when handling electrical components and networking equipment. Proper network setup ensures efficient system monitoring and troubleshooting. Refer to the manual for detailed step-by-step instructions. Carefully unpack and inventory all components, including the inverter, CT, Wi-Fi dongle, paper board, battery communication cable, and user manual for installation. The EG4 18kPV inverter comes with essential accessories to ensure smooth installation and operation. These include the inverter unit itself, wall-mounting brackets, a Wi-Fi dongle for network connectivity, communication cables for battery and PV systems, a current transformer (CT) for monitoring, and a detailed user manual. Additional items may include a paper board for notes and a battery communication cable to facilitate inter-battery connections. Ensure all components are accounted for before proceeding with installation. If any items are missing or damaged, contact the manufacturer or supplier immediately. Proper inventory ensures a hassle-free setup process and optimal system performance. Before installation, verify that all components of the EG4 18kPV system are present and undamaged. Check the inverter unit for any visible damage and ensure the Wi-Fi dongle, communication cables, and current transformer (CT) are included. Review the user manual to confirm all listed accessories are accounted for. Inspect the wall-mounting brackets for integrity and ensure the battery communication cable is intact. Verify that the paper board and any additional documentation, such as the technical specifications sheet, are provided. If any discrepancies are found, contact the supplier immediately. Proper verification ensures a seamless installation process and prevents potential issues during setup. This step is crucial for achieving optimal performance and safety. The EG4 18kPV inverter is designed for wall mounting, ensuring optimal space utilization and ease of access. Follow the manual’s installation guide for secure placement. The EG4 18kPV inverter is designed for wall mounting, ensuring optimal space utilization and ease of access. Begin by selecting a sturdy wall surface capable of supporting the inverter’s weight. Use the provided screws and wall anchors to secure the mounting bracket firmly. Ensure the surface is level and drill pilot holes as specified in the manual. Align the inverter’s mounting holes with the bracket and tighten the screws evenly to avoid damage. Double-check the inverter’s leveling using a spirit level for proper installation. Once mounted, verify all connections are secure and tightened properly. For additional stability, ensure the area around the inverter remains clear for ventilation and access. Always consult the manual for specific torque and alignment recommendations to ensure a safe and reliable installation. Proper ventilation is critical for the EG4 18kPV inverter to maintain optimal performance and longevity. Ensure the inverter is installed in a well-ventilated area, maintaining a minimum clearance of 10 cm from any surrounding objects. This prevents overheating and ensures efficient heat dissipation. Avoid installing the unit in enclosed spaces or areas prone to dust accumulation, as this can compromise airflow. If installing in a confined space, consider adding ventilation fans or openings to facilitate air circulation. Regularly inspect the inverter’s vents to ensure they are free from obstructions. Proper ventilation not only enhances reliability but also prevents potential damage from thermal stress. Always refer to the manual for specific ventilation recommendations tailored to your installation environment. Ensure proper electrical connections for the EG4 18kPV inverter by following the manual’s wiring diagrams. Connect AC power securely and configure DC connections for solar and battery integration. To connect the EG4 18kPV inverter to AC power, locate the AC terminal block on the rear panel. Ensure the mains supply is switched off before proceeding. Use appropriately sized cables to connect the AC input wires to the terminal block. Securely tighten all connections to prevent loose wiring. Turn the mains supply back on and verify the inverter’s display for AC power status. Always refer to the user manual for specific wiring diagrams and safety guidelines. Proper AC connections are crucial for safe and efficient operation of the inverter. Double-check all connections to avoid any potential electrical hazards or system malfunctions. To configure the DC connections for the EG4 18kPV inverter, begin by identifying the DC terminal block located on the front or side panel. Ensure the system is powered off before proceeding. Connect the positive and negative DC cables from the battery bank to the corresponding terminals, adhering to the correct polarity. Use high-quality, appropriately sized cables to minimize resistance. Secure all connections firmly to prevent loose wiring. Refer to the user manual for specific torque specifications. Once connected, turn the system on and verify the DC voltage on the inverter’s display. Ensure no short circuits exist between the terminals. Proper DC configuration is essential for efficient energy flow and system performance. Always follow safety guidelines to avoid electrical hazards. To configure DC connections for the EG4 18kPV inverter, locate the DC terminal block on the front or side panel. Ensure the system is powered off before starting. Connect the positive and negative DC cables from the battery bank to the corresponding terminals, ensuring correct polarity. Use high-quality, appropriately sized cables to minimize resistance. Secure all connections firmly to prevent loose wiring. Refer to the user manual for specific torque specifications. After connecting, turn the system on and verify the DC voltage on the inverter’s display. Ensure no short circuits exist between the terminals. Proper DC configuration is essential for efficient energy flow and system performance. Always follow safety guidelines to avoid electrical hazards; Calculating the battery capacity for your EG4 18kPV inverter setup is crucial to ensure reliable energy storage and backup performance. Start by determining your average daily energy consumption in watt-hours (Wh). Consider the depth of discharge (DOD) of your batteries, typically 50% for lead-acid and up to 80% for lithium-ion. Multiply your daily consumption by the number of backup days required. Divide this total by the system’s efficiency (usually 90-95%) to account for losses. For example, if you need 10 kWh/day for 2 days, and using lithium-ion batteries: 10 kWh * 2 = 20 kWh; 20 kWh / 0.8 (DOD) = 25 kWh. This ensures your battery bank can meet demand without over-discharging. Always refer to the EG4 user manual for specific calculations and recommendations tailored to your system. Proper sizing ensures optimal performance and longevity. To set up inter-battery communication for the EG4 18kPV inverter, ensure all batteries are compatible with the system and support the required communication protocol, typically RS485 or CAN bus. Begin by connecting the communication cable between the inverter and the battery management system (BMS). For multiple batteries, daisy-chain the communication cables, ensuring proper termination at both ends to prevent signal degradation. Next, access the inverter’s configuration menu and select the appropriate communication protocol. Input any necessary parameters, such as baud rate or device IDs, as specified in the manual. Verify connectivity by checking the inverter’s status indicators or logs for successful communication. If issues arise, troubleshoot by checking cable connections, ensuring all components are updated with the latest firmware, and confirming compatibility between the inverter and batteries. Proper inter-battery communication is essential for balanced charging, system monitoring, and optimal performance. Always refer to the EG4 manual for detailed instructions and specific recommendations. To ensure seamless operation, inter-battery communication is critical. Use the RS485 or CAN bus protocol for data transmission between batteries and the EG4 18kPV inverter. Connect communication cables securely, avoiding interference. Configure settings in the inverter’s menu to recognize each battery unit. Perform a system test to verify connectivity and data synchronization. Refer to the manual for detailed steps. The EG4 18kPV inverter is compatible with a wide range of solar panels, ensuring optimal energy harvesting. It supports maximum input voltage of 450V DC and a maximum input current of 50A per MPPT charge controller. The system allows for flexible solar panel configurations, enabling users to maximize their PV array’s potential. For optimal performance, ensure solar panels are properly matched to the inverter’s specifications. The EG4 18kPV also features MPPT (Maximum Power Point Tracking) technology, which efficiently extracts maximum power from the solar panels, even under varying conditions. Always refer to the user manual for specific compatibility guidelines and configuration recommendations to ensure safe and efficient operation of your PV system. The EG4 18kPV inverter allows users to prioritize solar power over other energy sources, optimizing renewable energy utilization. To set up PV charge priority, access the inverter’s control panel or remote monitoring software. Navigate to the charge settings menu and select “PV Charge Priority” to ensure solar energy is used first. This feature is ideal for reducing grid reliance and lowering energy costs. Ensure the PV charge priority mode is enabled and configured according to your energy needs. Refer to the user manual for detailed instructions on adjusting these settings. Proper configuration ensures maximum efficiency and performance of your solar system. Always verify settings after installation to confirm correct operation. The EG4 18kPV inverter offers a range of configurable settings to optimize performance and energy management. Users can set operating modes such as grid-tie, off-grid, or hybrid operation through the inverter’s control panel or remote monitoring software. Key settings include PV charge priority, peak shaving, and load control, which can be adjusted to meet specific energy needs. The inverter also allows customization of charge and discharge parameters for connected battery systems. Ensure all settings align with your system requirements for efficient operation. Refer to the user manual for step-by-step guidance on configuring these settings. Proper configuration is essential for maximizing the inverter’s functionality and ensuring seamless integration with solar and battery systems. Always verify settings after initial configuration to confirm optimal performance.
Technical Specifications of the EG4 18kPV
2.1 Rated Power and Voltage
2.2 Compatibility with Solar and Battery Systems
Safety Precautions and Guidelines
3.1 General Safety Measures
3.2 Handling and Storage Instructions
Installation Requirements
4.1 Location Selection for Optimal Performance
4.2 Network and Communication Setup

Unpacking and Inventory of Components
5.1 List of Included Accessories
5.2 Verifying All Components
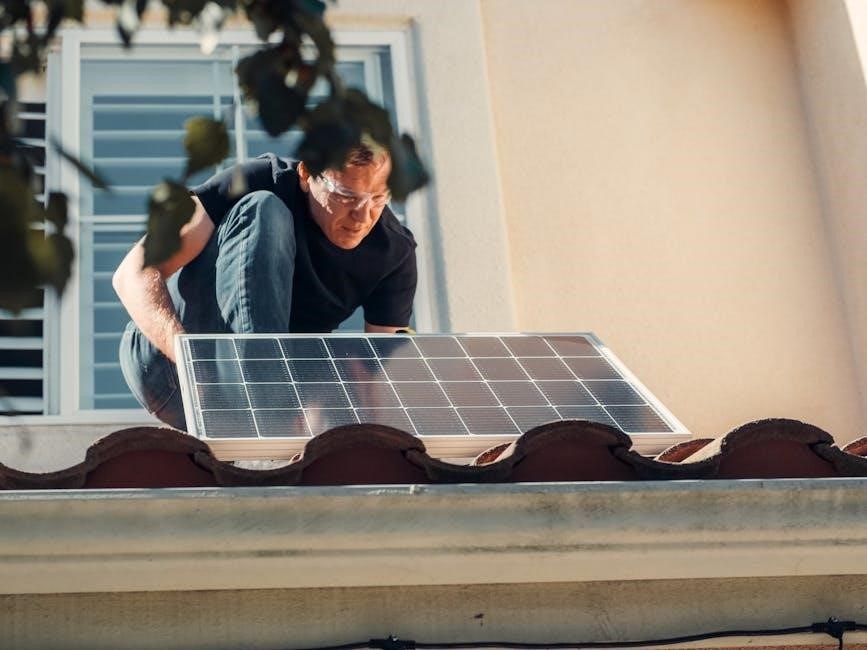
Mounting the EG4 18kPV Inverter
6.1 Wall-Mounting Instructions
6.2 Ensuring Proper Ventilation

Electrical Connections
7.1 Connecting AC Power
7.2 Configuring DC Connections

Battery Bank Setup
8.1 Calculating Battery Capacity
8.2 Establishing Inter-Battery Communication

PV System Configuration
9.1 Solar Panel Compatibility
9.2 Setting Up PV Charge Priority
Inverter Configuration and Settings