The Honeywell TH6320WF2003 is a Wi-Fi smart thermostat offering advanced features like geofencing and smart scheduling. It is compatible with heat pumps and conventional systems, designed for optimal home comfort and energy efficiency.
1.1 Overview of the TH6320WF2003 Model
The Honeywell TH6320WF2003 is a Wi-Fi-enabled smart thermostat designed for compatibility with both heat pump and conventional HVAC systems. It supports up to 2 stages of heating and cooling, making it versatile for various home setups. The thermostat features a touchscreen interface and integrates seamlessly with the Resideo App for remote temperature control. With geofencing and smart scheduling, it offers energy-saving capabilities and enhanced comfort. Its sleek design and compatibility with smart home systems make it a modern solution for homeowners seeking convenience and efficiency. The model is part of Honeywell’s T6 Pro Smart Thermostat series, known for reliability and advanced functionality.
1.2 Key Features of the Wi-Fi Smart Thermostat
The Honeywell TH6320WF2003 boasts advanced features such as geofencing, smart scheduling, and location-based temperature control. It allows users to adjust settings via the Resideo App, ensuring convenience from anywhere. The thermostat also features a built-in compressor protection mechanism, preventing system damage by enforcing cooling-off periods. Additionally, it supports flexible scheduling options, including time-based and location-based controls, and offers energy-saving modes. The device is compatible with both heat pumps and conventional systems, supporting up to 2 stages of heating and cooling. Its intuitive interface and remote capabilities make it a comprehensive solution for modern home climate control, enhancing comfort and efficiency seamlessly.
1.3 Benefits of Upgrading to a Smart Thermostat
Upgrading to the Honeywell TH6320WF2003 smart thermostat offers enhanced energy efficiency, remote control via the Resideo App, and personalized comfort. It learns your schedule and preferences, automatically adjusting temperatures to save energy when you’re away. Features like geofencing and smart scheduling optimize heating and cooling, reducing utility bills. The thermostat also provides maintenance reminders, ensuring your HVAC system runs smoothly. With a user-friendly interface and compatibility with various systems, it’s a convenient and affordable upgrade for modern homes, offering both comfort and cost savings while integrating seamlessly with smart home systems for a connected living experience.
System Requirements and Compatibility
The Honeywell TH6320WF2003 is compatible with 2 heat/2 cool conventional systems and 2 heat/1 cool heat pumps. It requires a 24VAC power source and a 2.4 GHz WiFi connection for smart functionality, ensuring seamless integration with most modern HVAC setups and home networks.
2.1 Heating and Cooling System Compatibility
The Honeywell TH6320WF2003 is compatible with 2 heat/2 cool conventional systems and 2 heat/1 cool heat pumps. It also supports dual fuel systems when paired with the appropriate model. The thermostat works with 24VAC systems and requires a common wire for proper operation. This versatility ensures it can integrate with most modern HVAC setups, providing precise temperature control for enhanced comfort and energy efficiency. Proper system compatibility is essential for optimal performance and must be verified before installation to avoid any operational issues.
2.2 WiFi Network Requirements
The Honeywell TH6320WF2003 requires a 2.4 GHz WiFi network for connectivity. Ensure your router supports this frequency band, as 5 GHz networks are not compatible. The thermostat supports WEP, WPA, and WPA2 security protocols. A stable internet connection is essential for remote control via the Resideo App. Before installation, confirm your network settings and ensure the thermostat is within range of your router for reliable performance. Proper WiFi setup enables features like geofencing, smart scheduling, and energy monitoring. A common wire (C-wire) is also necessary for continuous power supply to the thermostat during WiFi operation.
2.3 Mobile Device Compatibility
The Honeywell TH6320WF2003 is compatible with both iOS and Android mobile devices, enabling remote control via the Resideo App. Ensure your smartphone or tablet operates on iOS 11 or later, or Android 6.0 or higher. The Resideo App allows users to adjust temperatures, view schedules, and receive system alerts. A stable internet connection is required for seamless communication between the thermostat and your mobile device. Geofencing and smart scheduling features rely on location-based data from your phone to optimize energy usage. Download the Resideo App from the Apple App Store or Google Play Store to access these advanced features and manage your home’s comfort settings efficiently.

Pre-Installation Steps
Gather tools and materials, understand wiring configurations, and ensure proper power supply before starting the installation. This ensures a smooth and safe setup process for the thermostat.
3.1 Tools and Materials Needed
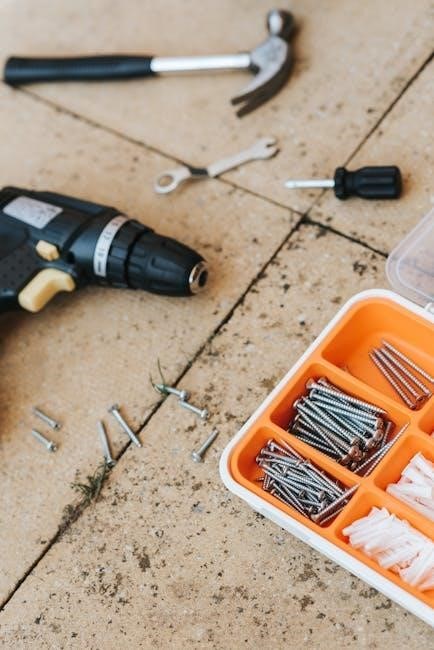
To install the Honeywell TH6320WF2003, you will need a screwdriver, wire strippers, and possibly a drill for wall mounting. Ensure you have wall anchors, screws, and any additional wiring materials. A voltage tester is recommended to verify power status. Refer to the manual for specific tools and materials tailored to your system type. Always turn off power to the HVAC system before starting installation to ensure safety and avoid electrical hazards. Proper preparation of tools and materials will streamline the installation process and help prevent delays or complications during setup.
3.2 Understanding the Thermostat Wiring
Understanding the wiring is crucial for a successful installation. The Honeywell TH6320WF2003 uses standard thermostat wiring, including R (24V power), C (common), G (fan), Y (cooling), W (heating), and possibly O/B (heat pump reversal). Ensure the wires are correctly matched to their respective terminals. For heat pumps, a slider switch may be required to select heating or cooling modes. If your system lacks a common wire (C), you may need an adapter or alternative power source. Always refer to the wiring diagram in the manual for specific configurations. Improper wiring can lead to system malfunctions or damage, so double-check connections before powering up the system.
3.3 Power Requirements for Installation
The Honeywell TH6320WF2003 requires a 24VAC power supply from your HVAC system. Ensure the system is turned off at the circuit breaker before starting installation. Verify the wiring configuration matches the thermostat’s terminal connections. A common wire (C) is typically required for power; if your system lacks one, an adapter may be needed. Do not connect the thermostat to line voltage (120/240V) directly, as this could cause damage. Always refer to the wiring diagram in the manual for specific power requirements. Proper power setup ensures safe and reliable operation of the thermostat and your HVAC system. Follow all safety precautions to avoid electrical hazards during installation.
Installation Process
Mount the thermostat, connect the wires according to the wiring diagram, and perform final checks to ensure proper functionality and safe operation of the HVAC system.
4.1 Mounting the Thermostat
Mounting the Honeywell TH6320WF2003 thermostat begins with turning off power to the HVAC system. Ensure the wall is level and mark the screw positions for the mounting bracket. Drill pilot holes if necessary, then secure the bracket to the wall. Attach the thermostat to the bracket, ensuring it is level and evenly aligned. Connect the wires to the appropriate terminals, following the wiring diagram. Once mounted, turn the power back on and test the thermostat’s basic functions to confirm proper installation. Ensure all connections are secure and the device is operational before proceeding to further configuration.
4.2 Connecting the Wires
Connecting the wires for the Honeywell TH6320WF2003 involves matching each wire to the correct terminal on the thermostat. Refer to the wiring diagram for specific connections, ensuring compatibility with your HVAC system. Gently insert each wire into its designated terminal, securing it firmly. Common wires (C) and power wires (Rc, Rh) must be correctly connected to avoid damage. For heat pumps, verify the correct configuration to prevent operational issues. Double-check all connections before powering on the system. If unsure, consult the manual or seek professional assistance to ensure safe and proper installation. Proper wiring is crucial for optimal thermostat performance and system efficiency.
4.3 Final Installation Checks
After completing the wiring and installation, perform a series of checks to ensure proper functionality. Turn on the power and test the thermostat by adjusting the temperature to confirm heating or cooling activation. Verify that all wires are securely connected and match the wiring diagram. Check for proper system operation, including heating, cooling, and fan modes. Ensure the thermostat is connected to your WiFi network and paired with the Resideo app. Review the schedule and settings to confirm they are correctly configured. Finally, clean the screen and ensure it is responsive to touch commands. These steps ensure a safe and efficient installation, ready for optimal performance.
Wiring Diagrams and Connections
The TH6320WF2003 wiring diagrams detail connections for standard, heat pump, and conventional systems, ensuring proper setup for power, heating, cooling, and fan operations as per manual guidelines.
5.1 Standard Wiring Configuration
The standard wiring configuration for the Honeywell TH6320WF2003 involves connecting the appropriate wires to the thermostat terminal board. Typically, this includes the R (24VAC power), W (heating), Y (cooling), G (fan), C (common), and Rh (heating power) wires. Proper connections ensure the system operates efficiently, with the R and C wires providing power to the thermostat. For dual-fuel systems, additional wiring may be required, especially if using a heat pump. Always refer to the manual to confirm specific terminal connections and ensure compatibility with your HVAC system. Incorrect wiring can lead to malfunctions or safety hazards, so careful installation is essential.
5.2 Heat Pump Wiring Diagram
The Honeywell TH6320WF2003 supports heat pump systems, requiring specific wiring configurations. For a 2H/2C heat pump, connect the Y (cooling), G (fan), C (common), and Rh (heating power) wires. The RRc terminal is joined using a slider tab for proper operation. Ensure the O/B wire is connected for heat pump reversal. Refer to the wiring diagram for 3H/2C systems, which involves additional terminals like Y2 for secondary stage cooling. Always verify compatibility and wiring requirements for your specific heat pump setup. Incorrect wiring can lead to system malfunctions, so double-check connections before powering on. Consult a professional if unsure to avoid potential damage or safety risks.
5.3 Conventional System Wiring
For conventional HVAC systems, the Honeywell TH6320WF2003 requires specific wiring connections. Connect the R (24VAC power) and Rh (heating) wires to the appropriate terminals. The W wire controls the heating stage, while Y handles cooling. The G wire operates the fan, and C provides the common connection. Ensure proper terminal assignments to avoid system malfunctions. The O/B wire, used for heat pumps, is not required for conventional systems. Double-check all connections against the wiring diagram to confirm compatibility and safety. If unsure, consult a licensed electrician to prevent potential risks or damage to the system. Accurate wiring ensures optimal performance and efficiency.

Configuring the Thermostat
Configure the Honeywell TH6320WF2003 by completing initial setup, connecting to your WiFi network, and setting up the Resideo app. Adjust settings, schedules, and geofencing for optimal control;
6.1 Initial Setup and Configuration
The initial setup of the Honeywell TH6320WF2003 involves powering on the thermostat and following on-screen instructions. Ensure your home WiFi network is available and select it during setup. Use the Resideo app to complete registration and link your thermostat to your account. Configure basic settings such as temperature preferences, system mode, and scheduling options. Enable geofencing for location-based control. The thermostat will automatically update its time and date when connected to WiFi. If needed, manually adjust these settings via the menu. Proper configuration ensures seamless operation and optimal performance of your smart thermostat system.
6.2 Connecting to WiFi Network
To connect the Honeywell TH6320WF2003 to your WiFi network, ensure your smartphone or tablet is connected to a 2.4 GHz network. Power on the thermostat and navigate to the WiFi settings through the menu. Select your network from the list, enter the password, and confirm. The thermostat will attempt to connect. Once connected, a confirmation message will appear. If connection fails, restart the thermostat and router, then retry. Ensure your network is stable and within range. Connection to WiFi enables remote control via the Resideo app, allowing you to adjust settings and monitor your system from anywhere. A successful connection is essential for smart features to function properly.
6.3 Setting Up the Resideo App
Download and install the Resideo app from the App Store or Google Play. Open the app and create an account or log in if you already have one. Tap “Add Device” and select the Honeywell TH6320WF2003 thermostat. Follow the in-app instructions to link your thermostat to the app. Ensure your thermostat is connected to WiFi before proceeding. Once linked, you can access thermostat settings, schedules, and advanced features like geofencing. Use the app to adjust temperatures, view energy usage, and receive alerts. The Resideo app provides remote control and monitoring, enhancing the smart features of your thermostat for optimal home comfort and energy management.
Programming and Scheduling
The Honeywell TH6320WF2003 allows users to create custom schedules and adjust temperatures based on their daily routines. It supports location-based temperature control and smart scheduling options, enabling efficient energy management and comfort. Users can modify settings via the Resideo app, ensuring seamless control over their home’s climate.
7.1 Creating a Custom Schedule
Creating a custom schedule on the Honeywell TH6320WF2003 thermostat is straightforward. Users can set preferred temperatures for different times of the day, including when they are home or away. The thermostat supports both time-based scheduling and location-based control, allowing for flexibility and energy efficiency. Through the Resideo app, users can define specific temperature settings for heating and cooling during weekdays and weekends. The system also allows for overrides, such as temporary or permanent holds, to adjust settings as needed. This feature ensures that the home remains comfortable while optimizing energy usage based on the user’s lifestyle and preferences.
7.2 Using Location-Based Temperature Control
The Honeywell TH6320WF2003 thermostat offers location-based temperature control through geofencing technology. This feature uses your smartphone’s location to automatically adjust your home’s temperature, saving energy when you’re away and ensuring comfort upon your return. To enable this feature, open the Resideo app, navigate to the menu, and select location-based control. You can customize settings to adjust temperatures based on your arrival or departure. This smart feature optimizes energy usage and enhances home comfort by adapting to your daily routine. It works seamlessly with your schedule and preferences, providing a convenient and efficient way to manage your home’s climate.
7.3 Adjusting Temperature Settings
Adjusting temperature settings on the Honeywell TH6320WF2003 is straightforward. Using the thermostat’s touchscreen or the Resideo app, you can set desired temperatures for heating and cooling. For manual adjustments, simply touch the up or down arrows on the screen. The app allows remote changes, ensuring comfort from anywhere. You can also program specific temperatures for different times of the day or use location-based control. Temporary overrides are available for up to 12 hours, while permanent holds maintain a set temperature until manually changed. These features provide flexibility and convenience, ensuring your home stays comfortable while optimizing energy use according to your preferences and schedule.
Advanced Features
The Honeywell TH6320WF2003 offers geofencing, smart scheduling, and energy-saving modes, enabling location-based temperature control, tailored energy use, and optimized comfort through advanced automation and remote management capabilities.
8.1 Geofencing Technology
The Honeywell TH6320WF2003 utilizes geofencing technology to automatically adjust your home’s temperature based on your location. By using your smartphone’s GPS, the thermostat detects when you leave or approach your home. This feature optimizes energy usage by reducing heating or cooling when you’re away and ensures a comfortable temperature upon your return. Geofencing can be set up through the Resideo App, allowing for seamless integration with your daily routine. It eliminates the need for manual adjustments, saving energy and enhancing convenience. This intelligent feature ensures your home is always at the right temperature while minimizing energy waste.
8.2 Smart Scheduling Options
The Honeywell TH6320WF2003 offers smart scheduling options for tailored temperature control. Users can create custom schedules using location-based control, time-based schedules, or a combination of both. The thermostat allows setting specific temperatures for home, away, and sleep modes, ensuring energy efficiency and comfort. Through the Resideo App, users can program schedules, adjust preferences, and override settings temporarily. The thermostat also supports geofencing, automatically adjusting temperatures based on your location. For convenience, it includes a default Monday-Friday and Saturday-Sunday schedule that can be customized to fit your lifestyle. These features provide flexibility and simplicity, making it easy to manage your home’s climate efficiently.
8.3 Energy-Saving Features
The Honeywell TH6320WF2003 includes energy-saving features designed to optimize your home’s energy consumption. The thermostat offers geofencing technology, which adjusts temperatures based on your location, ensuring energy isn’t wasted when you’re away. It also features smart scheduling, allowing you to set specific temperatures for different times of the day or modes like Home, Away, and Sleep. Additionally, the thermostat provides vacation hold settings, enabling you to maintain energy efficiency even when you’re not home. These features work together to reduce energy usage, helping you save on utility bills while maintaining a comfortable environment. The Resideo App further enhances these capabilities, offering insights and controls for optimal energy management.

Maintenance and Troubleshooting
The Honeywell TH6320WF2003 incorporates energy-saving features to reduce consumption. It uses geofencing to adjust temperatures based on your location, optimizing energy use when you’re away. The thermostat also offers smart scheduling, allowing you to program specific temperatures for different periods. Additionally, the vacation hold feature ensures efficient energy use while you’re away. These features, combined with insights from the Resideo App, help you monitor and control energy usage effectively, promoting savings without compromising comfort.
9.1 Cleaning the Thermostat Screen
To clean the Honeywell TH6320WF2003 thermostat screen, activate the clean screen mode by selecting “Clean Screen” in the menu. This locks the touchscreen, preventing accidental changes. Use a soft, dry cloth to wipe the screen gently. Avoid harsh chemicals or abrasive materials that could damage the display. For stubborn marks, slightly dampen the cloth with water, but ensure it is not soaking wet. After cleaning, touch the screen to exit clean screen mode. Regular cleaning maintains screen responsiveness and clarity, ensuring optimal performance and ease of use. Always refer to the user manual for detailed instructions.
9.2 Resetting the Thermostat
Resetting the Honeywell TH6320WF2003 thermostat can be done through the menu system. To reset, navigate to the “Reset” option in the settings. There are two types of resets: Schedule Reset and HomeKit Reset. The Schedule Reset reverts the thermostat’s schedule to the default settings, useful for starting fresh. The HomeKit Reset clears Apple HomeKit credentials, necessary for integrating with Apple’s smart home system. Ensure you back up custom settings before resetting, as they will be erased. After resetting, reconnect to Wi-Fi if necessary. Refer to the user manual for detailed instructions, as steps may vary with firmware updates or model differences.
9.3 Common Issues and Solutions
Common issues with the Honeywell TH6320WF2003 include connectivity problems, display malfunctions, and scheduling conflicts. For connectivity issues, restart the router and ensure the thermostat is connected to a 2.4 GHz network. If the display is unresponsive, clean the screen or reset the thermostat. Scheduling conflicts may require resetting the schedule or updating the thermostat’s software. If the thermostat fails to heat or cool, check wiring connections and ensure proper system compatibility. For persistent issues, refer to the user manual or contact Honeywell support. Regular updates and maintenance can prevent many of these problems and ensure optimal performance.
Safety Precautions
Always turn off power before installation or maintenance. Handle the thermostat with care to avoid damage. Keep it away from water and moisture. Dispose of the old thermostat responsibly, following local regulations. Ensure all electrical connections are secure to prevent hazards. Refer to the manual for specific safety guidelines and precautions to avoid injury or system damage.
10.1 Electrical Safety Guidelines
Always disconnect power before starting installation or maintenance to avoid electrical shock. Verify the system voltage matches the thermostat’s requirements. Never touch live wires or components. Ensure proper grounding of the system. Use appropriately rated tools and follow safe practices when handling electrical connections. Keep the thermostat away from water and moisture to prevent short circuits. Avoid overloading circuits, and ensure all connections are secure. If unsure, consult a licensed electrician. Adhere to local electrical codes and regulations. Failure to follow these guidelines may result in injury, damage, or void the warranty. Safety should always be the top priority during any electrical work.
10.2 Handling the Thermostat
Handle the Honeywell TH6320WF2003 thermostat with care to avoid damage. Avoid touching the screen excessively to prevent smudges or scratches. Use a soft cloth to clean the display. Store the thermostat in a dry, cool place if not installed immediately. Ensure it is not exposed to direct sunlight or moisture. Do not subject the device to physical stress, such as bending or dropping, as this may damage internal components. For transportation, use protective packaging to prevent shocks or impacts. Always follow the manufacturer’s guidelines for installation and removal to maintain functionality and warranty validity. Proper handling ensures optimal performance and longevity of the device.
10.3 Disposal Information
Dispose of the Honeywell TH6320WF2003 thermostat responsibly to protect the environment. Recycle the device whenever possible, as it contains electronic components and batteries that should not be sent to landfills. Remove any batteries before disposal and recycle them separately. Check local regulations for e-waste disposal options or participate in manufacturer-sponsored recycling programs. Honeywell may offer specific guidelines or partnerships for proper disposal. Ensure all personal data is erased by performing a factory reset before disposal. Proper disposal helps conserve resources and reduce environmental impact, aligning with sustainable practices. Always follow local and regional guidelines for electronic waste management to ensure compliance and eco-friendliness.
The Honeywell TH6320WF2003 installation process, from setup to final checks, ensures optimal performance. Proper configuration and maintenance will maximize energy efficiency and comfort in your home.
11.1 Final Checks Post-Installation
After installing the Honeywell TH6320WF2003, perform final checks to ensure proper functionality. Test heating and cooling modes to confirm system operation. Verify WiFi connectivity and Resideo app synchronization. Check scheduled settings and geofencing functionality. Ensure the thermostat screen is clean and responsive. Review energy-saving features and smart alerts for optimal performance. Confirm that all wiring connections are secure and meet safety standards. Verify that the thermostat is correctly configured for your HVAC system type. Ensure that the time and date are accurately set. Finally, review the user manual for any additional recommendations to ensure your system operates efficiently and effectively.
11.2 Tips for Optimal Performance
For optimal performance, regularly update your schedule based on lifestyle changes. Adjust temperature settings to balance comfort and energy savings. Use geofencing to automate temperature changes when leaving or arriving home. Enable smart alerts to monitor system performance and receive maintenance reminders. Clean the thermostat screen periodically to ensure accurate readings. Check for firmware updates to access new features and improvements. Utilize the Resideo app to track energy usage and adjust settings remotely. Enable features like compressor protection and ventilation settings for system longevity. Monitor and adjust backlight brightness for visibility. These tips ensure your Honeywell TH6320WF2003 operates efficiently and maintains home comfort.
11.3 Contact Information for Support
For any questions or issues regarding the Honeywell TH6320WF2003 thermostat, visit the official Honeywell Home website at honeywellhome.com. Contact customer support via phone at 1-800-633-3991 or through their social media channels: Twitter (@HoneywellHome) and Facebook (@HoneywellHome). Additional support resources, including manuals and troubleshooting guides, are available on the Resideo app and website. For warranty inquiries or technical assistance, refer to the professional install guide or user manual provided with your thermostat. Ensure to use genuine Honeywell parts for any repairs to maintain warranty validity and optimal performance.