
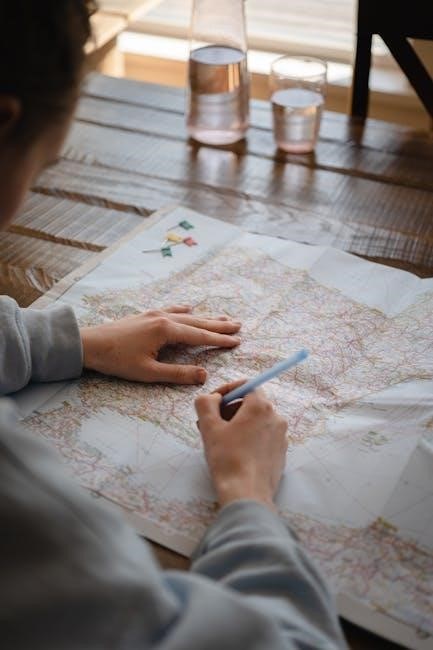
Eyelash mapping is a technique used to plan and customize eyelash extensions, ensuring a balanced and natural look. It involves assessing the lash line to determine the best placement, length, and volume of extensions for each client’s eye shape and personal style. This step is crucial for achieving a flawless, tailored result that enhances the client’s natural beauty; By creating a lash map, professionals can ensure symmetry, proportion, and a seamless blend of extensions with natural lashes, making it an essential skill for lash artists.
What is Eyelash Mapping?
Eyelash mapping is a precise technique used to plan and design custom eyelash extensions. It involves assessing the natural lash line to determine the optimal placement, length, and volume of extensions for each section of the eye. This method ensures a balanced, natural-looking result tailored to the client’s eye shape and personal style. By creating a detailed map, lash artists can achieve symmetry and proportion, enhancing the client’s features while maintaining a seamless blend with their natural lashes. This step is essential for delivering personalized, professional results in eyelash extension applications.
Why is Eyelash Mapping Important?
Eyelash mapping is crucial for creating a customized and balanced look. It ensures extensions are applied strategically to enhance natural beauty while maintaining lash health. By carefully planning the placement, length, and volume of lashes, artists can avoid overloading certain areas, preventing damage and discomfort. Mapping also helps achieve symmetry and proportion, making the eyes appear more defined and polished. This technique allows for a personalized approach, catering to individual eye shapes and styles. Proper mapping is essential for delivering professional, long-lasting results and keeping clients satisfied with their lash transformations;

Preparing for Eyelash Mapping
Preparation involves cleaning the lashes thoroughly to remove dirt, oils, and makeup, ensuring a smooth surface for mapping; This step is essential for precise application and long-lasting results.
Cleaning the Lashes
Cleaning the lashes is a critical step in eyelash mapping. It involves gently removing dirt, oils, and residue using a lash shampoo or a mild cleanser. Proper cleaning ensures a smooth surface for mapping and prevents any interference with the adhesive. Use a lint-free brush or swab to cleanse each lash line thoroughly, paying attention to the base where extensions will be applied. Rinse with warm water and pat dry to maintain natural lash health. Clean lashes promote better adhesion and reduce the risk of irritation or infection, ensuring a safe and effective lash mapping process.
Removing Makeup and Oils
Removing makeup and oils is essential for a successful lash mapping process. Start by using a gentle makeup remover to wipe away mascara, eyeliner, and eyeshadow. Next, cleanse the lash line with a lash-specific cleanser to eliminate oils and residue. This ensures the adhesive adheres properly and prevents lifting. Use a cotton swab to carefully remove any remaining product from the base of the lashes. Finish by rinsing with warm water and patting dry. A clean, oil-free surface is crucial for precise mapping and long-lasting results, ensuring the extensions bond securely to the natural lashes.
Choosing the Right Products
Selecting high-quality lash products is vital for successful mapping. Opt for durable adhesives and lashes that complement the client’s eye shape and desired aesthetic, ensuring long-lasting results.
Selecting the Best Adhesive
Choosing the right adhesive is crucial for a successful lash application. Look for a high-quality, medical-grade adhesive with a suitable drying time for your technique. Consider the client’s sensitivity and allergic reactions. Opt for low-fume adhesives to ensure comfort. Black adhesives are ideal for creating a natural look, while clear adhesives are great for sensitive eyes. Always follow the manufacturer’s instructions for use and storage. Proper ventilation during application is essential. The adhesive’s strength and flexibility will impact the longevity of the lashes. Selecting the right one ensures a durable, comfortable, and flawless lash extension application for your clients.
Picking the Right Lash Extensions
Selecting the right lash extensions involves considering material, length, curl, and thickness to match the client’s natural lashes and desired look. Mink, silk, and synthetic lashes are popular choices, each offering unique benefits. Lengths range from short to long, while curls vary from subtle to dramatic. Thickness determines volume, with finer lashes for a natural appearance and thicker ones for bold styles. Ensure the extensions complement the client’s eye shape and personal style. Properly chosen lashes enhance the natural beauty of the eyes, creating a seamless and flattering outcome tailored to individual preferences and lash conditions.

Mapping by Eye Shape
Eyelash mapping considers individual eye shapes to determine the most flattering extension placement, length, and curl, enhancing natural beauty and creating a personalized look tailored to each client.
Almond Eyes
Almond-shaped eyes are one of the most versatile eye shapes for eyelash extensions. They suit a wide range of lash styles, from natural to dramatic looks. When mapping for almond eyes, focus on enhancing their natural elongation by placing longer lashes toward the outer corner. This creates a subtle cat-eye effect without overpowering the eye. Medium to long lengths work best, with a gradual increase in length from the inner to outer lash line. Opt for curls that lift and open the eyes, such as C or D curls, to complement the almond shape. Balancing volume and length ensures a harmonious, polished finish that accentuates the eyes’ natural beauty.
Round Eyes
Round eyes benefit from lash mapping techniques that create the illusion of length without adding volume. Start by placing shorter to medium-length lashes at the inner corner to avoid overwhelming the eye. Gradually increase lash length toward the outer corner to elongate the shape. Use lighter to medium volume lashes to maintain balance and avoid heaviness. Opt for B or C curls to lift and open the eyes without exaggerating their roundness. Focus on enhancing the outer third of the lash line to create a subtle cat-eye effect, drawing attention to the eye’s natural curve. This approach ensures a harmonious, flattering look tailored to round eyes.
Hooded Eyes
Hooded eyes require careful lash mapping to create the illusion of more space. Start by applying lighter, shorter lashes at the inner corner to avoid heaviness. Use medium-length lashes along the center of the lash line to add depth without overwhelming the eye. Avoid excessive volume on the outer corner, as it can make the eye appear smaller. Instead, place the longest lashes toward the outer edge to create a subtle lift. Opt for a softer curl, like a B curl, to enhance the eye without over-dramatizing it. This technique ensures a balanced, natural look that complements the unique shape of hooded eyes. Proper mapping enhances the illusion of openness and defines the eye subtly, making it essential for hooded eye shapes to maintain a light, airy appearance while still adding drama. Focus on symmetry and proportion to keep the look fresh and polished.
Step-by-Step Guide to Creating a Lash Map
Creating a lash map begins with assessing the client’s eye shape, natural lash line, and desired aesthetic. Divide the lash line into sections, marking where extensions will be applied. Choose lash lengths, thicknesses, and curls suitable for each section. Apply a light layer of adhesive and carefully place extensions according to the map, ensuring symmetry and a natural look. This process ensures a customized, polished appearance tailored to the client’s features.
Assessing the Natural Lash Line
Assessing the natural lash line is the first step in creating a personalized lash map. Examine the client’s eye shape, lash length, and thickness to determine the best placement for extensions. Measure the natural lashes to identify sparse areas and areas with fuller growth. Note the client’s eye shape—almond, round, or hooded—as this influences the extension placement. Evaluate the lash line’s natural direction and curvature to ensure extensions complement the client’s features. This assessment ensures a balanced, natural-looking result tailored to the client’s unique characteristics, guiding the placement of varying lengths, curls, and volumes for a seamless finish.
Marking the Lash Line
Marking the lash line is a precise step in eyelash mapping that guides extension application; Professionals use a fine-tip eyeliner pencil or a specialized marker to create subtle, visible marks. These marks indicate where extensions should start and end, ensuring symmetry and alignment with the natural lash line. For different eye shapes, the marking technique varies: almond eyes may require a softer, more curved mark, while round or hooded eyes might need a slightly different approach. The marks should be light yet clear, avoiding smudging. Using a ruler or measuring tool helps achieve symmetry between both eyes. If mistakes occur, gentle makeup remover can correct them. This step is essential for a tailored, balanced look that enhances the client’s natural beauty.
Applying the Extensions
Applying eyelash extensions requires precision and care to ensure a seamless finish. Once the lash map is marked, extensions are applied strand by strand or in small clusters, starting from the inner corner and working outward. A fine-tip tweezers is used to gently grasp and place each extension close to the natural lash line. The adhesive is applied sparingly to avoid excess. Extensions should be secured without touching neighboring lashes to prevent clumping. Proper isolation ensures a natural look and prevents damage. After application, allow the adhesive to set before touching or adjusting. This step is critical for achieving a durable, balanced result that complements the client’s eye shape and lash map.
Advanced Techniques
Advanced techniques elevate lash artistry through methods like layering for volume and creating a cat eye effect. These skills refine the application process, ensuring a polished, customized look tailored to each client’s preferences and eye shape.
Layering for Volume
Layering for volume involves applying multiple lightweight extensions to individual lashes to create a fuller, more dramatic look. This technique requires precision to avoid overloading the natural lashes. By carefully selecting extensions of varying lengths and thicknesses, artists can build depth while maintaining a natural appearance. Proper layering enhances the lash line without causing damage, ensuring comfort and longevity. It’s essential to use a high-quality adhesive and apply extensions in a way that promotes even distribution. This method is particularly effective for clients seeking a voluminous yet realistic aesthetic, making it a popular choice in modern lash artistry.
Creating a Cat Eye Effect
Creating a cat eye effect through eyelash mapping involves strategic placement of lashes to mimic the winged eyeliner look. Start by assessing the client’s eye shape to determine the best approach. For most eyes, focus on extending the outer corner lashes to create a dramatic wing. Use longer and thicker lashes towards the outer edge, gradually transitioning from shorter lashes at the inner corner. Apply a deeper curl at the outer corner to enhance the lift. Ensure proper spacing to avoid overloading and maintain comfort. This technique adds depth and creates a sultry, eye-enhancing effect tailored to individual features.

Common Mistakes and Troubleshooting
Common mistakes in eyelash mapping include overloading lashes and uneven application. Troubleshooting involves using the right adhesive and ensuring proper spacing for a balanced look.
Identifying these issues early ensures a polished finish.
Overloading the Lashes
Overloading occurs when too many extensions are applied to a single natural lash, causing damage or breakage. This mistake often results from poor mapping or improper product selection. To prevent this, ensure each extension is applied to a healthy, isolated natural lash. Using too many or overly thick lashes can overwhelm the lash line, leading to an unnatural appearance. Symptoms include clumping or uneven distribution. Proper spacing and careful selection of lash weights are key to avoiding this issue. Addressing it early prevents long-term damage and ensures a balanced, natural-looking result.
Uneven Application
Uneven application occurs when lashes are not distributed evenly across the lash line, leading to an imbalanced appearance. This can happen if the artist fails to properly map the lashes or applies extensions inconsistently. To avoid this, ensure symmetry by carefully planning the placement of each extension. Start from the center and work outward, adjusting lengths and volumes as needed. Regularly check the progress to maintain balance. Using a lash map helps in achieving a seamless look, preventing one area from appearing thicker or longer than others. Proper technique and attention to detail are crucial for a polished finish.
Mastering eyelash mapping elevates your lash artistry, ensuring stunning, customized results. Proper techniques enhance natural beauty, offering clients confidence and satisfaction through precise, personalized lash designs.
The Benefits of Proper Lash Mapping
Proper lash mapping enhances natural beauty by creating balanced, symmetrical results. It boosts confidence, offering a personalized look that complements each client’s unique features. By tailoring extensions to individual lash lines, it ensures lashes appear fuller, longer, and more voluminous. This technique minimizes damage by distributing weight evenly, promoting healthy lashes. It also streamlines the application process, saving time and effort. Lash mapping ensures client satisfaction, as it aligns with their desired aesthetic, whether natural or dramatic. Overall, it elevates the quality of lash extensions, making it a cornerstone of professional lash artistry.
Final Tips for Perfecting Your Technique
Mastering lash mapping requires patience and practice. Always start by thoroughly understanding your client’s eye shape and personal preferences. Use high-quality products to ensure durability and a natural finish. Pay attention to symmetry and balance, as these are key to a professional look. Blend extensions seamlessly with natural lashes for a cohesive appearance. Customize the lash map based on the client’s lifestyle and desired outcome. Continuously educate yourself on new trends and techniques to stay ahead in the industry. With dedication and attention to detail, you’ll achieve stunning, long-lasting results that exceed client expectations.